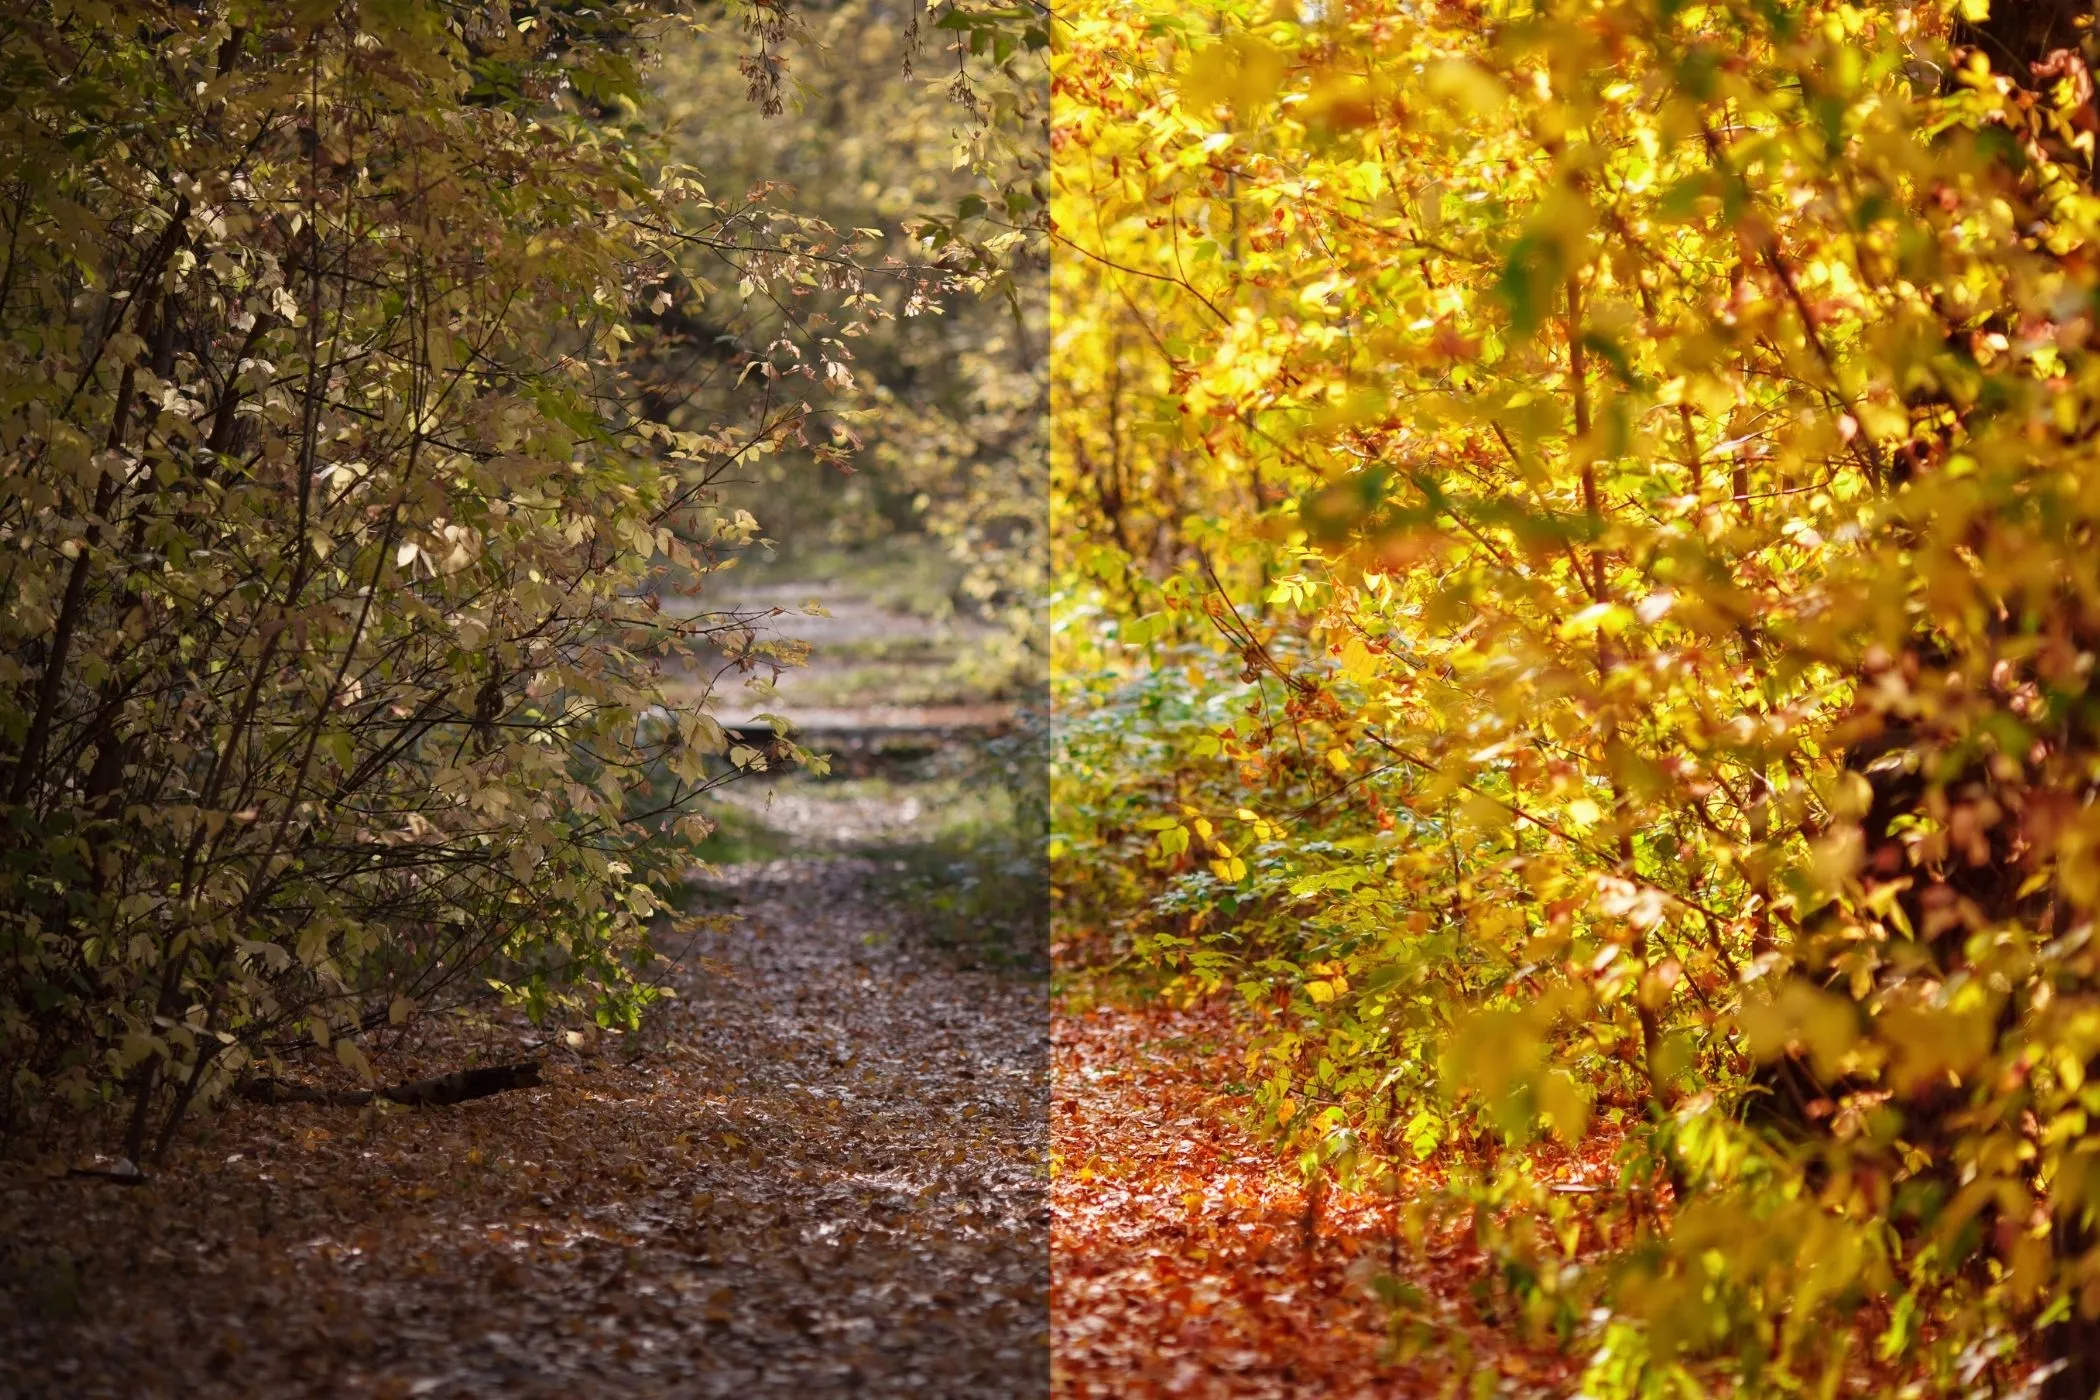
Brightness & Contrast in One Sentence
This tool makes photos brighter, punchier, and more readable by combining classic Brightness and Contrast with Gamma (midtone control) and a gentle Soft S-Curve (filmic contrast) — all in your browser.
When This Tool Is the Right Choice
Use Brightness & Contrast when your image is:
- Too dark (underexposed) and needs a lift
- Too flat (low separation) and needs more punch
- Washed out (highlights dominate) and needs better balance
- Dull in the midtones (faces or products look lifeless)
It’s also perfect for quick “finish work” before publishing:
- blog headers
- hero images
- product photos
- thumbnails
- social posts
Everything runs locally — no uploads, no queues, no waiting.
Workflow & Usage
1. Add an image
Drag & drop, paste (Ctrl/⌘+V), or click to select a JPEG / PNG / WebP.
2. Adjust in this order (fastest path to good results)
- Brightness → set the overall lightness
- Gamma → fix midtones (faces, products, interiors)
- Contrast → add separation and clarity
- Soft S-Curve → make contrast feel “filmic” and smooth
3. Use Surprise Me (optional)
Click Surprise me ✨ for a random set of pleasing settings. It’s great for discovering a look quickly, then nudging sliders to taste.
4. Download
Export at full resolution. The filename includes your settings, for example:
photo-brightness-115-contrast-135-gamma-1p20-scurve-35.jpg
Understanding the Controls
Brightness (0–200%, 100 = neutral)
Brightness here behaves like a global lightness multiplier:
- < 100 darkens
- > 100 brightens
Use Brightness to get the image into a “good exposure zone” before you do anything else.
Tip: If you push brightness and the image starts to look flat, add a small amount of contrast or S-curve afterwards.
Contrast (0–200%, 100 = neutral)
Contrast increases (or decreases) separation around the midpoint:
- < 100 = softer / flatter
- > 100 = punchier / more separation
If contrast is too high, shadows can crush and highlights can blow out. If that happens, back off contrast and try raising Soft S-Curve a bit instead.
Gamma (0.20–3.00, 1.00 = neutral)
Gamma is your midtone dial.
In this tool, higher gamma makes midtones brighter (it lifts the middle values more than shadows/highlights).
Use gamma when:
- faces look dull even after brightness
- interiors are muddy
- you want a gentle lift without “blowing out” bright areas as aggressively
Rule of thumb:
- 1.05–1.25: subtle midtone lift (very common)
- 1.25–1.60: strong lift (use carefully)
- 0.70–0.95: deepen midtones (more dramatic)
Soft S-Curve (0–100)
Soft S-Curve adds a film-like contrast curve:
- increases separation in the midtones
- gently compresses extremes
- often feels more “premium” than raw contrast
Great for:
- portraits that need pop without harshness
- product shots that should feel crisp but not crunchy
- giving a consistent “finish” across a set of images
Quick Recipes (Copy These)
These ranges are starting points — every photo is different.
Fix a dark photo (underexposed)
- Brightness: 115–150
- Gamma: 1.10–1.45
- Contrast: 95–125
- Soft S-Curve: 10–45
If it looks foggy after lifting, raise contrast slightly or add a bit of S-curve.
Add punch to a flat image
- Brightness: 95–115
- Gamma: 0.95–1.20
- Contrast: 120–160
- Soft S-Curve: 20–65
If edges look too harsh, lower contrast and increase S-curve.
“Soft film” finish (gentle, modern)
- Brightness: 95–120
- Gamma: 1.10–1.35
- Contrast: 85–115
- Soft S-Curve: 35–80
This is great for portraits and editorial images.
Matte / faded look
- Brightness: 100–125
- Gamma: 1.25–1.85
- Contrast: 60–95
- Soft S-Curve: 0–35
Matte is usually “less contrast + lifted midtones.”
Cinematic punch
- Brightness: 80–110
- Gamma: 0.75–1.05
- Contrast: 135–190
- Soft S-Curve: 45–100
If shadows crush, reduce contrast first.
Tips for best results
1. Avoid clipping
Clipping means details become pure black or pure white.
If you lose detail in dark hair, black clothing, or bright skies:
- reduce Contrast
- reduce Brightness slightly
- use a small Gamma lift instead of more brightness
2. Use Gamma for faces and products
Faces and products live in the midtones. Gamma is often the cleanest way to make them “feel right” without overdoing contrast.
3. Prefer S-Curve over extreme contrast
High contrast can look crunchy. Soft S-Curve usually looks smoother — especially on photos.
4. Keep a consistent look across a set
If you’re editing multiple images for a blog post, product catalog, or social carousel:
- pick one “recipe”
- apply small adjustments per image
- use similar S-curve levels for consistency
Common Problems
“My whites look blown out.”
- Lower Brightness
- Lower Contrast
- Try raising Gamma slightly instead of raising Brightness
“Shadows look crushed / too dark.”
- Reduce Contrast
- Increase Gamma slightly (1.05–1.25)
- Reduce Soft S-Curve if it’s high
“It looks harsh / crunchy.”
- Lower Contrast
- Increase Soft S-Curve a bit (yes — it can look smoother than contrast)
- Keep Gamma closer to 1.00
“It looks washed out after brightening.”
- Add a touch of Contrast (105–130)
- Or add S-Curve (15–45)
How It Works
To keep the tool fast, it builds a look-up table (LUT) that maps every possible channel value (0–255) to a new value.
The mapping runs in this order:
- Brightness (global multiplier)
- Contrast (around the mid-point)
- Gamma (non-linear midtone shift)
- Soft S-Curve (smooth filmic contrast)
Then the LUT is applied to each pixel’s R, G, B values while preserving alpha.