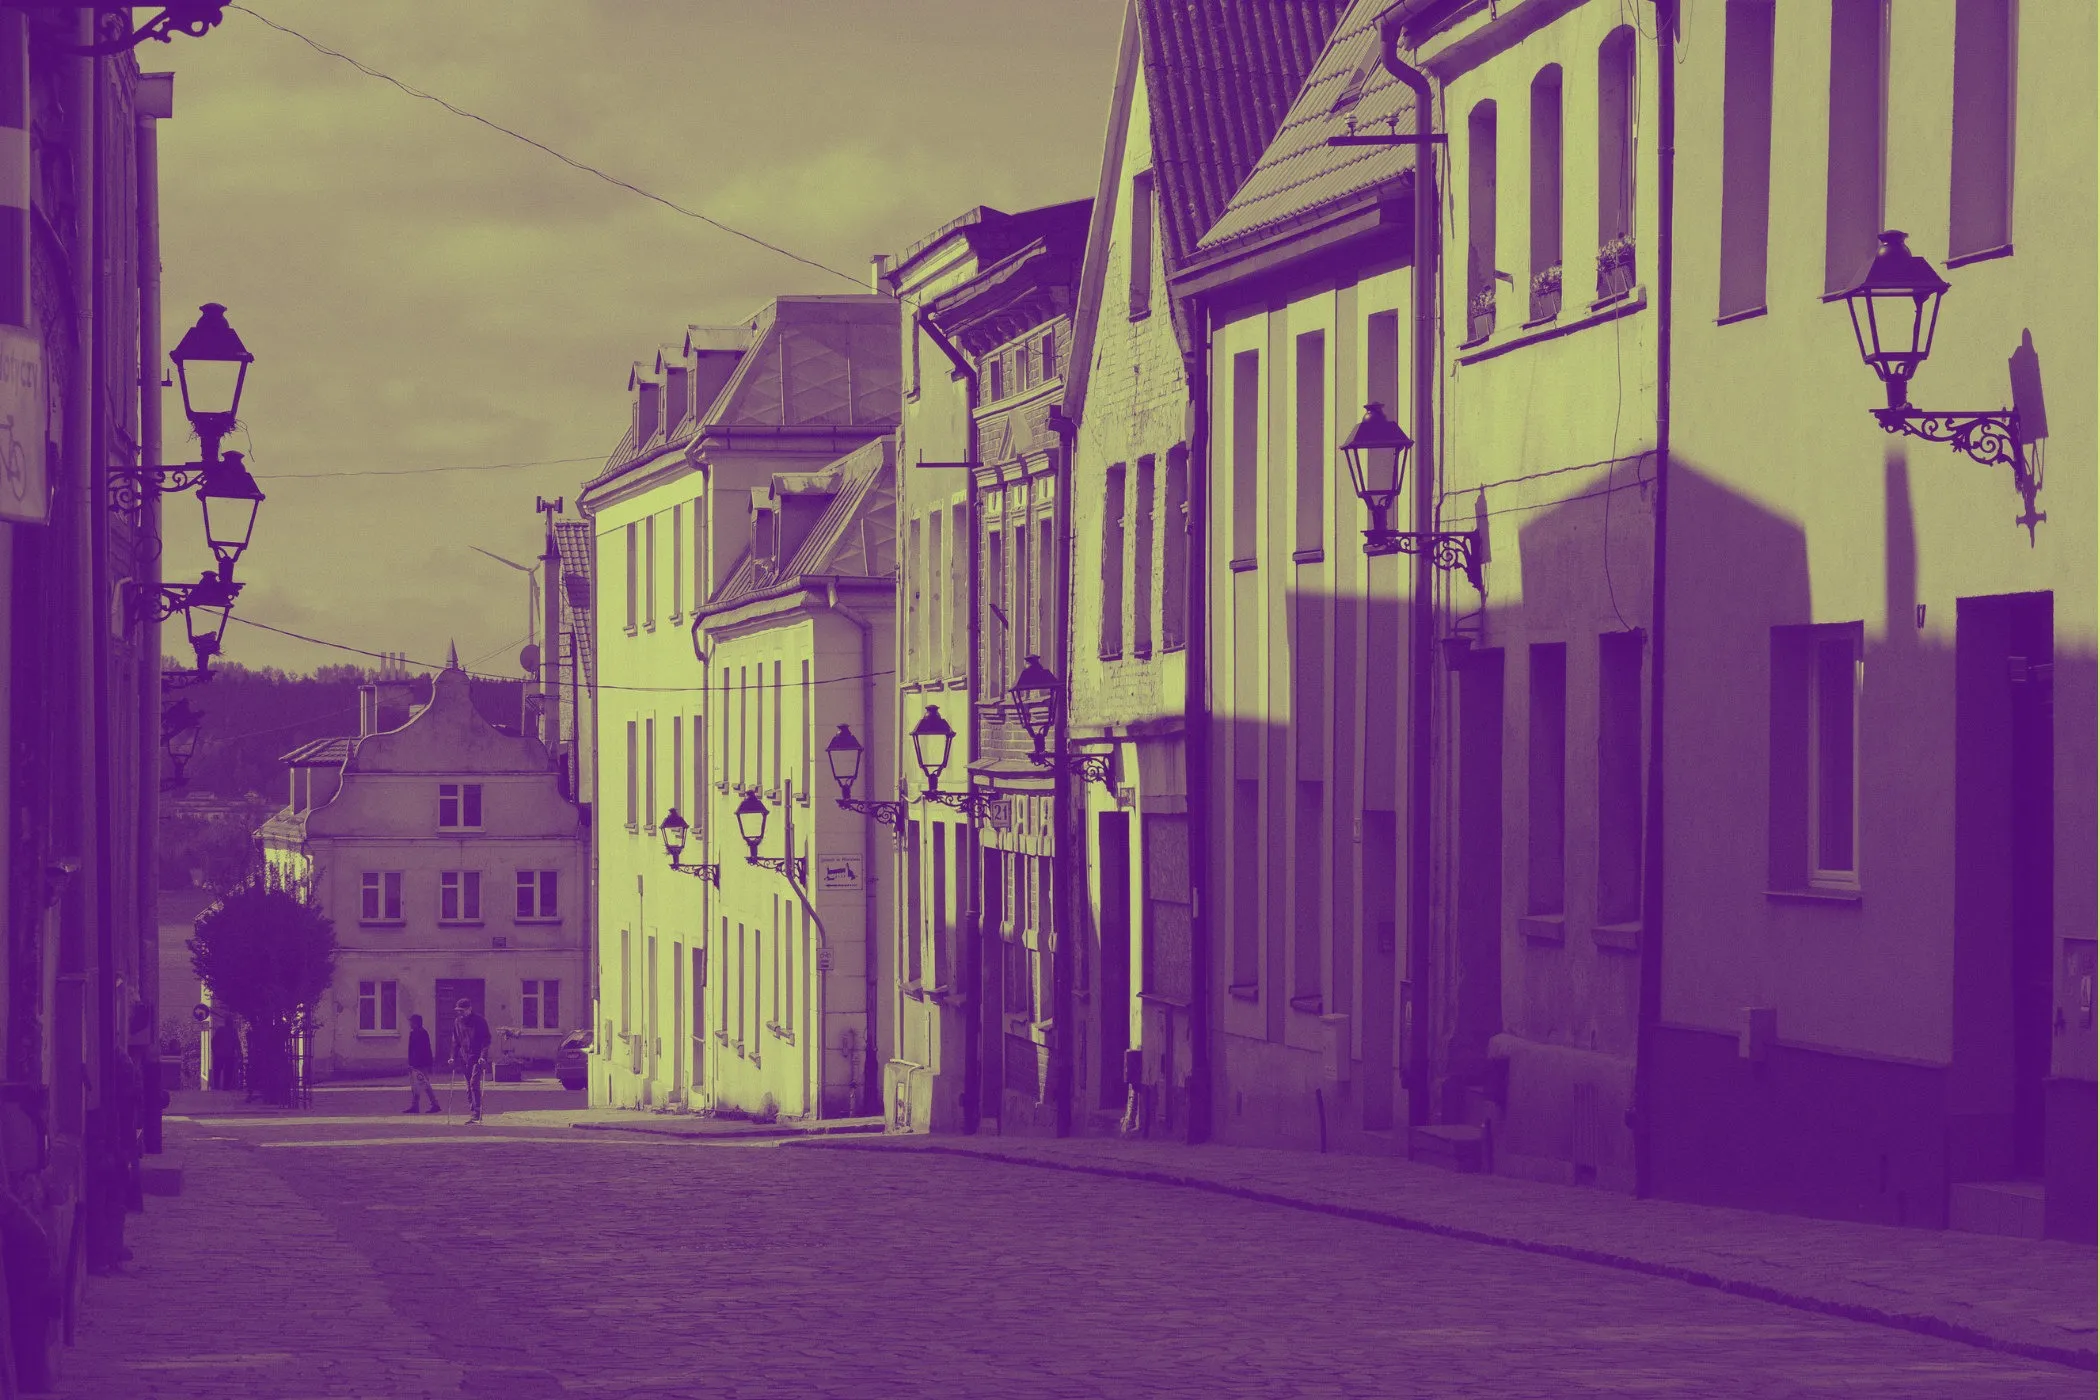
Duotone in One Sentence
A duotone effect turns any photo into a two-color graphic by mapping dark areas to one color (Shadow) and bright areas to another (Highlight). It’s the quickest way to get a poster-like, brand-consistent look without editing software.
Why Duotone Looks So Good
Duotone is popular because it’s simple, bold, and flexible:
- Brand consistency: replace messy photo colors with two brand tones.
- Instant mood: the same image can feel retro, modern, dramatic, or soft just by changing the pair.
- Readable overlays: duotone backgrounds often work better behind text than full-color photos.
- Print-friendly style: duotone comes from print workflows (two inks / two plates) and still carries that clean graphic feel.
Workflow & Usage
1. Add an image
Drag & drop, paste, or click to select a JPEG / PNG / WebP.
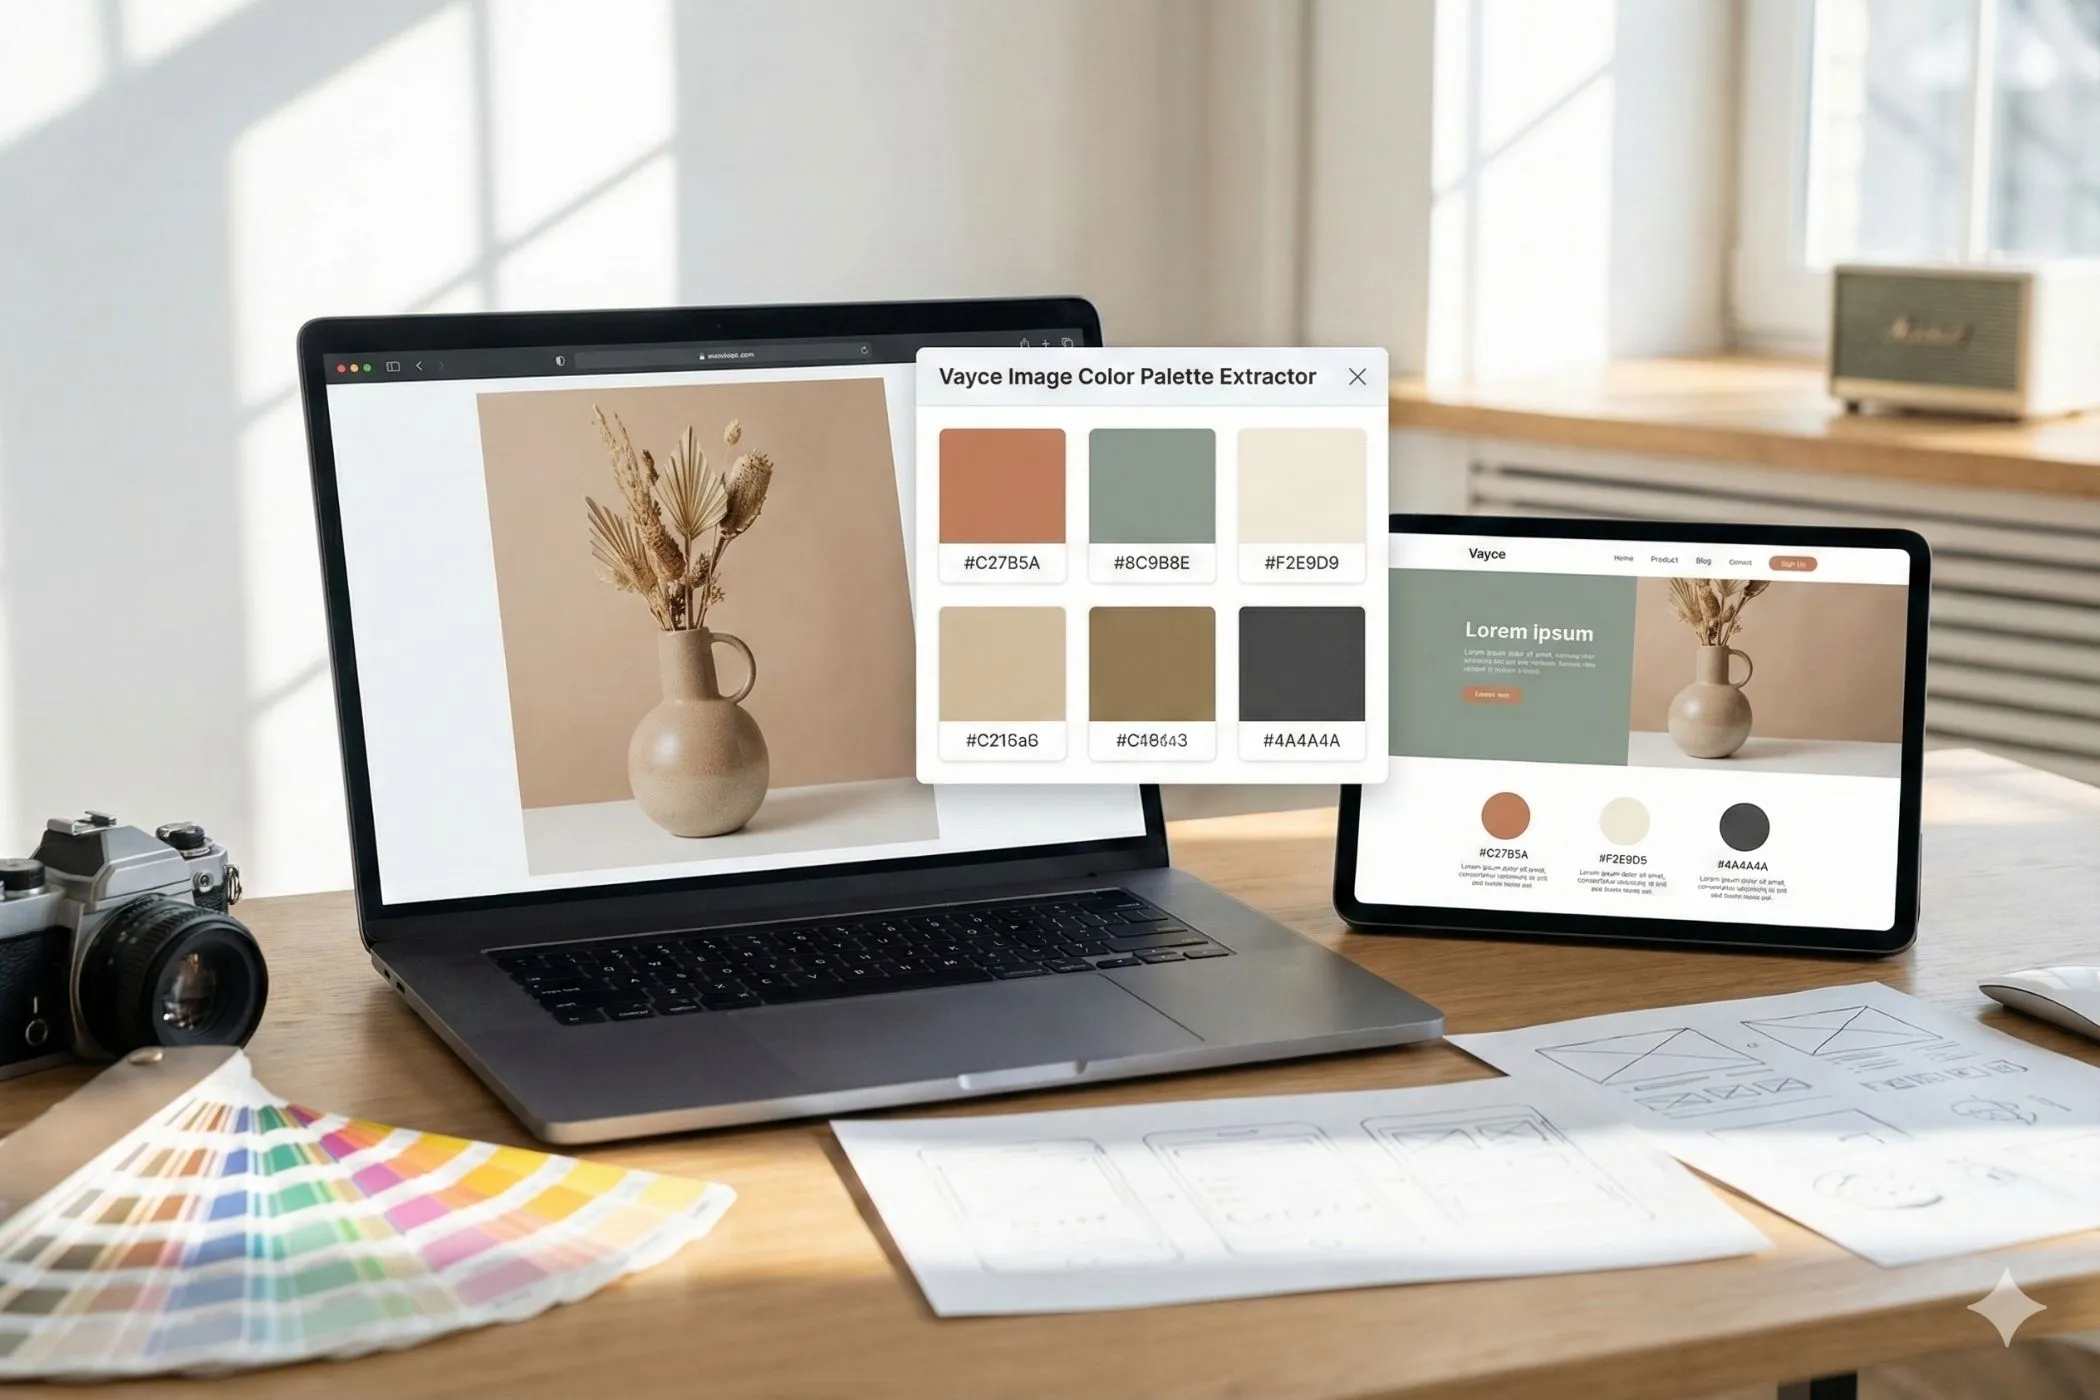
2. Choose Shadow + Highlight colors
- Shadow Color → used for darker tones
- Highlight Color → used for brighter tones
Each control has:
- a visual color picker
- a synced hex input (e.g.
#ff0055)
Need inspiration? Click Surprise Me to generate a balanced palette.
3. Adjust Balance
The Balance slider shifts how strongly the mapping favors one side:
- Lower values → more Shadow dominance (moody, gritty)
- Higher values → more Highlight dominance (bright, punchy)
4. Download
Export instantly. The file keeps the original format and a descriptive name like:
photo-duotone-0f172a-f97316.jpg
What Is a Duotone Effect?
A duotone effect recreates a photo using only two colors while preserving the photo’s shading and detail. It’s not the same as:
- Black & white: removes color but keeps grayscale only.
- Tint / wash: applies one color uniformly (often flat-looking).
- Color grading: keeps original colors and shifts them.
- Posterize: reduces tones into harsh bands.
Duotone keeps smooth tonal transitions, but replaces the entire palette with your chosen pair.
How Duotone Works (Step-by-Step)
Under the hood, duotone is a very direct idea:
-
Read the pixel’s brightness The tool computes a luminance value for each pixel (how bright it is).
-
Normalize brightness to a 0 → 1 range
- 0 = full shadow
- 1 = full highlight
-
Interpolate between two colors The output pixel becomes a blend between Shadow and Highlight based on that value.
-
Bias with Balance Balance changes the curve so midtones lean more toward Shadow or Highlight.
That’s why the effect is fast, predictable, and works on nearly any photo.
Duotone Color Pair Ideas
If you want “starter palettes”, try these:
Clean + modern
- Navy → Orange (
#0f172a→#f97316) - Charcoal → Mint (
#111827→#34d399) - Deep Blue → Cyan (
#1e3a8a→#22d3ee)
Retro / editorial
- Burgundy → Cream (
#7f1d1d→#fef3c7) - Forest → Beige (
#064e3b→#f5f5dc) - Purple → Pink (
#4c1d95→#fb7185)
High-energy / neon
- Black → Lime (
#000000→#a3e635) - Deep Purple → Electric Blue (
#3b0764→#38bdf8) - Dark Teal → Hot Pink (
#042f2e→#f472b6)
Tip: if your duotone looks “muddy”, increase contrast between the two colors or push Balance slightly toward Highlight.
Perfect For
-
Branding & Identity Create consistent hero images and social cards using your brand tones.
-
Landing pages & product marketing Make backgrounds that support text overlays and CTAs.
-
Posters & graphic design Get bold, high-contrast visuals with minimal effort.
-
Blog headers & UI illustrations Unify mixed sources into one style.
-
Social media content Create cohesive sets for feeds, stories, thumbnails, and promos.
-
Thumbnail systems Standardize a look across a series (YouTube, courses, newsletters).
Tips for Best Results
Pick the right source image
- Photos with clear lighting (good shadows + highlights) duotone best.
- Images with heavy noise or low contrast may look flat — consider compressing/cleaning first.
Choose colors with intent
- Complementary or far-apart colors → bold and clean.
- Same-hue colors (monochrome duotone) → subtle and premium.
Balance is your “tone control”
- If the image feels too dark: raise Balance toward Highlight.
- If highlights are overpowering: lower Balance toward Shadow.
Swap the colors
Switching Shadow and Highlight can completely change the mood.
Export smart for the web
- Use WebP when you can for smaller file sizes.
- After exporting, optimize with Image Compressor.
- For JPG workflows, consider Progressive JPEG Converter.
Common Problems (Quick Fixes)
“My duotone looks washed out.” Try a higher-contrast pair (darker Shadow + brighter Highlight) and push Balance slightly toward Highlight.
“Skin tones look weird.” Duotone replaces all colors. For portraits, use softer pairs (e.g., burgundy → cream) and keep Balance near the middle.
“Text overlay isn’t readable.” Pick a darker Shadow and lower Balance a bit, or choose a Highlight that isn’t too close to white.
“My photo is sideways.” Most modern browsers respect EXIF orientation, but if your image was exported without EXIF metadata, rotate it first and re-upload.
Accessibility & Design Notes
- Duotone is great for reducing visual noise, but be careful with text contrast.
- If you place text on top of a duotone background, test it with light and dark text.
- For UI/brand systems, keep a consistent pair (or small set of pairs) to build recognition.